
I've been a long time fan of Bioshock and recently (in the last few months) I thought it would be a great idea to tackle a Subject Delta costume. I will try post pictures of my progress as I create the costume. It's a little difficult because sometimes I get too engrossed in the project to take the time to step back and take pictures.
Delta's Helmet


My failed attempts left me a little discouraged but I continued on. My buddy Jason (aka Jeddy or Jeddychan "http://jeddychansproductions.alters1.com" ) suggested that I try Pepakura. I never used it before but I figured it would be a good time to try it. Unfortunately I didn't take any pictures of the paper craft once it was finished but the end results were outstanding once I modified the helmet a little bit to fit my own body. The helmet was fiber glassed to strengthen it and then I put spray foam on it to give it a layer in order to add things (visor, tanks, hoses, etc.) 24 hours after the spray foam dried I started to carve it to make it a little more smooth.


I finished smoothing the helmet out and also doing a little bit of cutting to refit it. Here are some images of the helmet as it is right now and what it looks like when it's worn. The jumpsuit, gloves, and boots will be modified and recolored. The thick edges of the helmet will also be sanded and smoothed down.


Update 1: Making some progress on my helmet. Removed some of the foam on the inside of the back so it would be less "chunky" and I also installed the visor into the helmet and now the next step is the one I've been fearing to do. Fiber-glassing! Here are some pictures of the helm before I fiber-glass it.


Update 3: Finished fiber-glassing the helmet! I was surprised and also incredibly happy that the fiber-glass resin didn't effect the foam in anyway . Now the helmet is fairly solid. I filed down some of the rough edges here and there. Now all I have to do is bondo it a little to fill in the holes and also add another thin layer of resin to make it have a smooth surface. I also adjusted the visor by spreading the bars out a little further because they were too close together.


Diving Weight

Here is the next piece of the Delta suit, The Diving Weight or to others, A Pendant, or a Lock-shaped diving weight. I drew up a sketch on a 11x17" sheet of Bristol paper, cut out the shape, and then drew an outline on a piece of MDF. I took three pieces of MDF and held them together with two screws and cut out the shape with an electric jigsaw. The first piece I made was straight cut with the help of my father. We took turns holding the piece in place and cutting it out. I tried to sand down the edges but to me it didn't seem consistent.


The first piece was a guinea pig. I hit it with a Maul a few times to make it look worn and beat up to match Delta's.
For the second piece I did almost the same process except when it was cut the jigsaw was changed to cut at an angle, a great deal of thanks goes to my father who thought of cutting it at an angle and again helping me cut it out. This made it so the slope on the pendant was consistent all around. After it was cut out, the 3 pieces were glued together with good ol' fashion wood glue and then the holes were made for the rope to go through.


All that's left is some fiber glassing and some paint to add the finishing touches.
Head Camera

The Camera on Delta's head! This was probably the easiest of all the pieces to do. I have no progress pictures of it because I was having too much fun making it... It's composition is easy though. The camera was made but cutting out pieces of green Dry Foam (from Michaels) and sanding them down to the correct shape. For the camera lens I used a thick cardboard tube and cut out a circle piece of cardboard to be put inside the tube to act as a lens. When I get my Ureshell I can harden this and finish it.
Here are a couple pictures of the camera on the helmet. When I able to Ureshell it I can paint it. The lens will be painted black and the coated with Future Acrylic Floor Finish to give it some shine as if it were glass.


Update 1: Tested some fiber-glass on a piece of spare green foam. It doesn't warp it in anyway and its fairly smooth when it's dry. When I get around to fiber-glassing the helmet I will be fiber-glassing this as well.
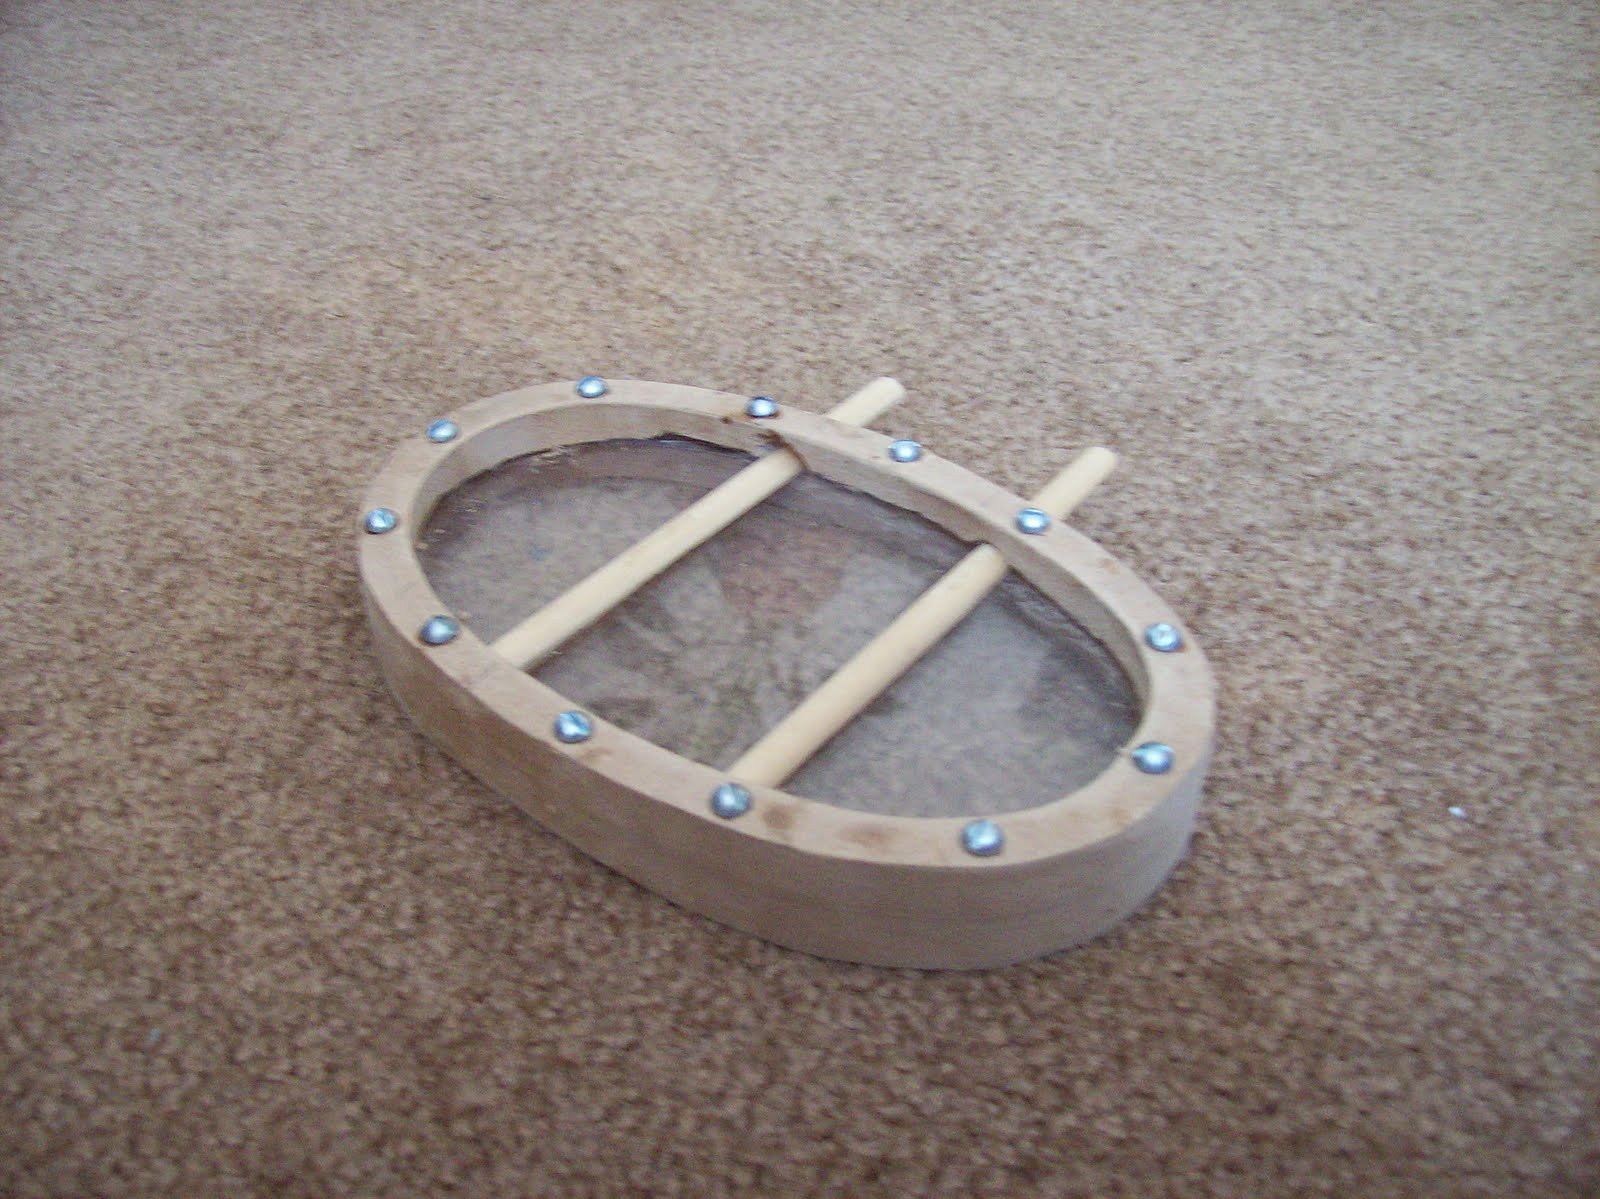
The Visor Rim
I did the same thing for the visor rim as I did with the Diving Weight. Drew up a sketch and the cut it out to make and outline. It will be two layers of MDF thick so I can cut out a portion of the helmet where the visor rim is suppose to go and insert it. Details such as bolt heads and the clear visor piece will be added soon.


Update 1: The visor is almost done! Woo! I cut out the visor finally and added the "glass", and everything else. The bars, which are just wooden dowels cut in half, of the visor need to be fixed to it with epoxy and then the gritty inside of the visor will be bondo'd to fill it in.


A Couple Additional Accessories
I was thinking about a few things that might improve the costume. The first thing that might help are fans. These will be put inside the back of the helmet with the grate over them so they don't stick out as much and also so I don't die from overheating.

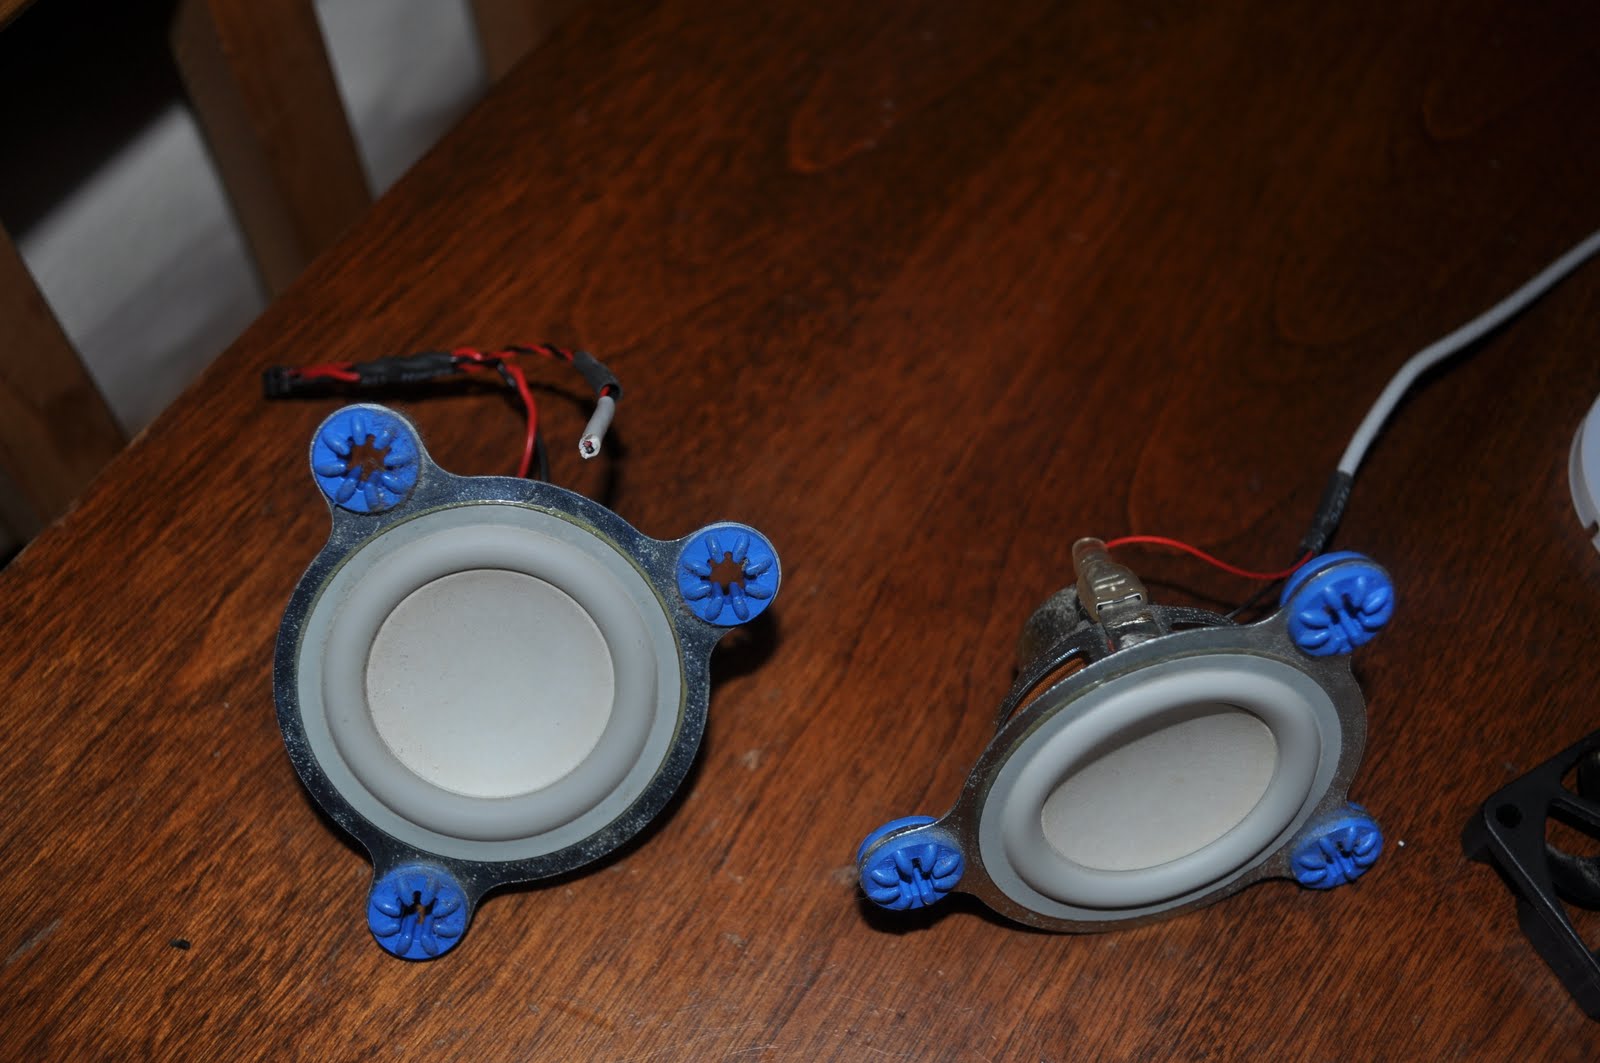
The next addition are these nifty speakers. These will be put inside of the chest lights with a similar grate for the fan, so it still looks like a lens for the lights. The speakers will be hooked up to an Arduino with buttons running to the hands so I can play a specific Big Daddy sound when I need to.

Luckily I found all of these things in computers that had been thrown away at my local dump. I'm sure if anyone needed to find any of these things, they can be bought at a RadioShack..... or found at a local dump.
Update 1: I've been thinking lately and I decided to cut the audio out. It would be cool to have the sound of a big daddy installed in the suit but it would add too much extra weight to the already heavy costume. The fans are also going to go in a different area where they can't be seen. Instead of being installed into the helmet, I'm going to place them in the bottom of the tanks on the back of the helmet where they are out of sight. I'm also going to create a rubber (or plastic) funnel with a hose connected to each fan. The hose will run up through the back of the helmet on the inside and around the visor. One fan will blow air in while the other blows it out to vent the air properly. Holes will be poked in the area of the hose that's closest to my face and the visor. This will provide cool air to breathe and also defog the visor while I walk around.
I was thinking about a few things that might improve the costume. The first thing that might help are fans. These will be put inside the back of the helmet with the grate over them so they don't stick out as much and also so I don't die from overheating.

The next addition are these nifty speakers. These will be put inside of the chest lights with a similar grate for the fan, so it still looks like a lens for the lights. The speakers will be hooked up to an Arduino with buttons running to the hands so I can play a specific Big Daddy sound when I need to.
Luckily I found all of these things in computers that had been thrown away at my local dump. I'm sure if anyone needed to find any of these things, they can be bought at a RadioShack..... or found at a local dump.
Update 1: I've been thinking lately and I decided to cut the audio out. It would be cool to have the sound of a big daddy installed in the suit but it would add too much extra weight to the already heavy costume. The fans are also going to go in a different area where they can't be seen. Instead of being installed into the helmet, I'm going to place them in the bottom of the tanks on the back of the helmet where they are out of sight. I'm also going to create a rubber (or plastic) funnel with a hose connected to each fan. The hose will run up through the back of the helmet on the inside and around the visor. One fan will blow air in while the other blows it out to vent the air properly. Holes will be poked in the area of the hose that's closest to my face and the visor. This will provide cool air to breathe and also defog the visor while I walk around.
The Drill
Alright here's the drill part that I started on. Honestly, it's much easier than I expected. So here's the progress run down.I started by making several circles that would serve as the reference to make other circles.


After the circles were made, I made a second pair that were solid and would serve as the skeleton for the drill. The center of each circle was found and I made a hole in order to run the metal rod through. I set each circle down 4 inches apart so it would be proportional to myself and hot glued each piece to the rod.

After that I hot glued paper around the circles making a cone shape. Several layers were applied to make it even. Then holes were drilled so I could fill the empty areas with spray foam for extra support later on and also to make it stronger and hold better. Finally, the cone was fiber glassed. I will post more updates as I continue to finish the drill.


Update 1: Ok. So the drill was a little bit of a disaster. When I tested it, to see how well it spun, the drill cone continued to spin after the drill stopped. I ripped the metal rod out and I'll be making a new one, except this time the holes will be drilled into the rod and a pin will go through each hole. The cardboard pieces will have a notch where the pin will rest into it and then they will be epoxied in. For a little more reinforcement duct tape will be used to hold the cardboard pieces in place.
Update 2: I got a drill! All thanks to my friend E.J. Thank you E.J.!! The drill will be used to power, well, the drill! Anyway, I took apart the drill and I will extend the wires so they can run up through the back of the helmet into the tanks where the battery for the drill will go. I'm going to get started on the drill again, once I get a few things. My father suggested that instead of using a solid steel pole that I should use a hollowed one with a thread so that I could put washers and nuts on it to hold the cardboard. This was an amazing suggestion because it solved the annoying "loose" problem I was having with the pole and the cardboard pieces. When I get the nuts and washers I can put the cardboard in place and then tighten the pieces and epoxy the them together, that way they do not continue to spin and the parts will be fairly secure.
Drill Before:

Drill After:


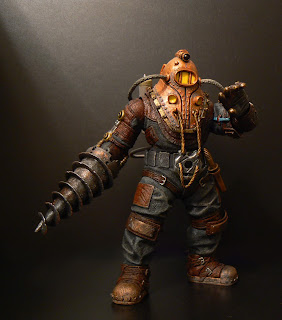
Reference Images!
Always helpful to have plenty of reference.


Suit and Leather Patches
I'm starting on the suit now since I'm at a bit of a dead end with my helmet. It's not fitting properly because its back and front layer are a little too thick. I started shaving off some of the layers and then I thought, "Maybe I should finish the suit first... then I can shave little bits off till it fits properly." Better to shave off little bits later than shave bits off first and have the helmet be loose... So anyway, I began working on the suit and getting all the parts to make it look proportional. First is the Navy blue jumpsuit. Had it sometime after I started the project I just didn't get around to making the patches for it till recently. Also in all the concept art the suit changes color. So I'm just going with the color that seems to be used most. Looks good...

Had an issue come up where I was trying to think of way to "bulk-up" since Delta is a rather bulky man judging by his biceps and calves. I tried a few different things all of which ended in disappointment. First I tired bubble wrap... just because it was lying around and it was at hand. It was impossible to move in and I overheated pretty quick. Then I tried foam by making full arm and leg pads. That didn't work either and again I overheated. Then I thought about under armor and football players and came to the decision that my best bet would be some kind of protective sports gear. I found a hockey chest and shoulder padding that worked perfectly. It was $30 dollars which is fine because I want this costume to be correct and not half-assed. I solved the chest and shoulder bulkiness problem but I still had the issue with the biceps. It wasn't until Halloween that someone suggested " What about one of those muscle man costumes?" So I went out and looked and I found an awesome muscle man outfit that was light, it fixed the bulk issue, and it didn't overheat me.


After I had the under layers I could start working on the outer patches that add just a tiny bit of layering to the costume. I didn't want to use leather because it would have been really hard to sew onto the suit. I went out to fabric stores and after some searching I found some pleather (plastic leather) that fit the costume. After a couple test I found that the material was incredibly easy to work with. I made several patches and there are plenty more to come. The patches will be sewed onto the suit with yarn and stitch borders.


Two test pieces below to figure out how well it fit on the shoulders. Giving it and angle down along the shoulders made it fit better.


Final piece for the chest with folded over edges.


Alright here's the drill part that I started on. Honestly, it's much easier than I expected. So here's the progress run down.I started by making several circles that would serve as the reference to make other circles.


After the circles were made, I made a second pair that were solid and would serve as the skeleton for the drill. The center of each circle was found and I made a hole in order to run the metal rod through. I set each circle down 4 inches apart so it would be proportional to myself and hot glued each piece to the rod.

After that I hot glued paper around the circles making a cone shape. Several layers were applied to make it even. Then holes were drilled so I could fill the empty areas with spray foam for extra support later on and also to make it stronger and hold better. Finally, the cone was fiber glassed. I will post more updates as I continue to finish the drill.


Update 1: Ok. So the drill was a little bit of a disaster. When I tested it, to see how well it spun, the drill cone continued to spin after the drill stopped. I ripped the metal rod out and I'll be making a new one, except this time the holes will be drilled into the rod and a pin will go through each hole. The cardboard pieces will have a notch where the pin will rest into it and then they will be epoxied in. For a little more reinforcement duct tape will be used to hold the cardboard pieces in place.
Update 2: I got a drill! All thanks to my friend E.J. Thank you E.J.!! The drill will be used to power, well, the drill! Anyway, I took apart the drill and I will extend the wires so they can run up through the back of the helmet into the tanks where the battery for the drill will go. I'm going to get started on the drill again, once I get a few things. My father suggested that instead of using a solid steel pole that I should use a hollowed one with a thread so that I could put washers and nuts on it to hold the cardboard. This was an amazing suggestion because it solved the annoying "loose" problem I was having with the pole and the cardboard pieces. When I get the nuts and washers I can put the cardboard in place and then tighten the pieces and epoxy the them together, that way they do not continue to spin and the parts will be fairly secure.
Drill Before:

Drill After:

Reference Images!
Always helpful to have plenty of reference.


Suit and Leather Patches
I'm starting on the suit now since I'm at a bit of a dead end with my helmet. It's not fitting properly because its back and front layer are a little too thick. I started shaving off some of the layers and then I thought, "Maybe I should finish the suit first... then I can shave little bits off till it fits properly." Better to shave off little bits later than shave bits off first and have the helmet be loose... So anyway, I began working on the suit and getting all the parts to make it look proportional. First is the Navy blue jumpsuit. Had it sometime after I started the project I just didn't get around to making the patches for it till recently. Also in all the concept art the suit changes color. So I'm just going with the color that seems to be used most. Looks good...

Had an issue come up where I was trying to think of way to "bulk-up" since Delta is a rather bulky man judging by his biceps and calves. I tried a few different things all of which ended in disappointment. First I tired bubble wrap... just because it was lying around and it was at hand. It was impossible to move in and I overheated pretty quick. Then I tried foam by making full arm and leg pads. That didn't work either and again I overheated. Then I thought about under armor and football players and came to the decision that my best bet would be some kind of protective sports gear. I found a hockey chest and shoulder padding that worked perfectly. It was $30 dollars which is fine because I want this costume to be correct and not half-assed. I solved the chest and shoulder bulkiness problem but I still had the issue with the biceps. It wasn't until Halloween that someone suggested " What about one of those muscle man costumes?" So I went out and looked and I found an awesome muscle man outfit that was light, it fixed the bulk issue, and it didn't overheat me.


After I had the under layers I could start working on the outer patches that add just a tiny bit of layering to the costume. I didn't want to use leather because it would have been really hard to sew onto the suit. I went out to fabric stores and after some searching I found some pleather (plastic leather) that fit the costume. After a couple test I found that the material was incredibly easy to work with. I made several patches and there are plenty more to come. The patches will be sewed onto the suit with yarn and stitch borders.


Two test pieces below to figure out how well it fit on the shoulders. Giving it and angle down along the shoulders made it fit better.


Final piece for the chest with folded over edges.


No comments:
Post a Comment